
Using DenSureFit on a Lower Denture
Having realistic expectations are important.
Yes! DenSureFit may be used on the lower denture.
-
What to EXPECT from DenSureFit on the Lower Denture
Fills Voids
DenSureFit silicone is designed to create a new impression on the surface of the denture, and fill the voids caused by gum shrinkage, which may help improve the stability and overall fit of loose lower dentures.
Cushioning Effect
The soft silicone provides a cushion against the hard acrylic denture base, and this effect may help reduce potential discomfort or gum soreness.
Provides a More Secure Fit
When applied to a well-fitting denture, the material is formulated to provide a secure fit and may help limit the entry of food and liquids around the denture edges.
-
NOTE about a FLOATING or POPPING UP Lower Denture
Since DenSureFit is not an adhesive, it likely will not hold your denture down on your lower gum line. This is the job of an adhesive.
DenSureFit will do a great job filling the voids in your lower denture. But since a lower denture rests on the gum line and doesn’t get suction, most tend to float or pop up.
In this case, the extra security of a powder adhesive works well in conjunction with the DenSureFit liner to keep the denture secured to the lower gum line.
Typical Results on the Lower Denture
-
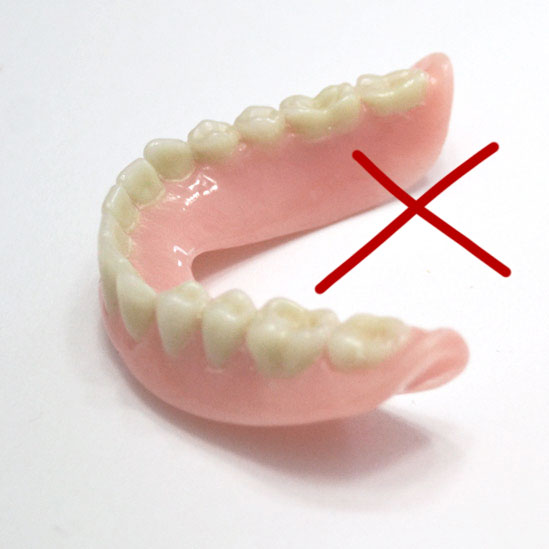
Short Walls
- Provides soft cushioning against the hard denture base.
- Designed to minimize the reliance on cream adhesives.
- Note on Stability: As DenSureFit does not function as an adhesive, it may not prevent lower denture movement (floating) caused by insufficient retention.
- Recommendation: The use of a powder adhesive and/or Dr. B’s Adhesadent is often recommended in conjunction with DenSureFit for enhanced stability in cases involving short or flat lower ridges.
-
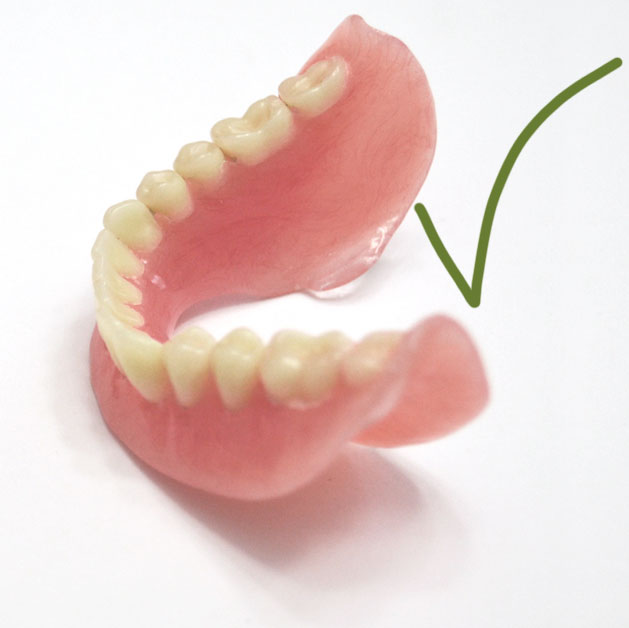
Tall Walls
- Provides soft cushioning against the hard denture base.
- Designed to minimize the reliance on cream adhesives.
- May reduce the need for daily adhesives.
- Powder adhesive may be needed for added stability.


Watch a DenSureFit user apply it to her lower denture.
Part 2 of 4
Part 3 of 4
Part 4 of 4
Typical Results on the Lower Denture
-
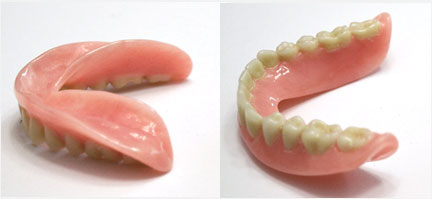
Short Walls
- Superior cushioning
- Powder adhesive VERY LIKELY to be required
- Able to eliminate cream adhesive
- DenSureFit cannot solve the “floating” issue
-
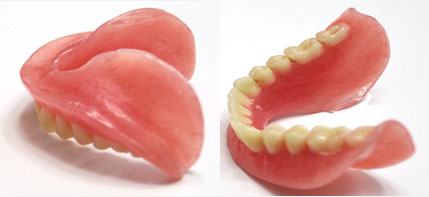
Tall Walls
- Superior cushioning
- Increased chance of being adhesive-free
- Powder adhesive might be required
- Able to eliminate cream adhesive


Can DenSureFit be used on a Lower Denture?
Lower Dentures
If you are considering using DenSureFit on lower dentures, please read the following information for proper expectations. A link to the procedure for relining the lower denture with DenSureFit is at the end of this article, or click here.
DenSureFit can provide cushion and comfort on the lower denture, but you may still need adhesive to keep it in place. We recommend a POWDER adhesive that works best with the DenSureFit silicone.
Can DenSureFit be used on Lower Dentures?
Even though DenSureFit is ideal for upper dentures, the product may also be used on lower dentures. The following information can help you determine how much or how little it might help you. You must have realistic expectations regarding the results this product might offer for your particular lower denture situation.
Challenges with Relining Lower Dentures
Even experienced dentists encounter challenges when relining lower dentures. Most dentists will not guarantee that their soft reline will solve all your lower denture issues. Keep in mind that DenSureFit cannot guarantee the resolution of all your lower denture issues either; however, it may help make lower dentures fit better and more comfortable to wear. Lower dentures are more challenging than upper dentures simply because they do not have the advantages of the upper palate shape in helping to create good suction.
Well-made lower dentures (those with sides that extend down to the bottom of the jaw bone) will typically get better results from applying DenSureFit. Trial and error may be necessary to achieve good results with the product on lower dentures. We provide a basic procedure to follow, but you should be aware that even in the best-case scenario, you may still need to use powder adhesive over DenSureFit on your lower denture.
When Additional Adhesive May Be Necessary
Dentures with low ridges and shallow troughs can benefit from DenSureFit's cushioning. Still, DenSureFit cannot prevent your lower denture from popping (or “floating”) up off the gum line. Dentures that “float” off the gum line are not the best candidates for obtaining a better fit with DenSureFit. “Barely there” ridges and shallow troughs offer very little surface area for the denture to grab onto your gums. Unfortunately, DenSureFit cannot solve this issue. If this is your case, use DenSureFit solely for the comfort and cushioning benefits.
It’s also important to note that adding even a thin layer of silicone to your denture can sometimes make a shallow denture “float” even more. In those situations, you would still need to use powder adhesive to help keep your lower denture properly seated, and you may still have issues. If you are in this situation, consult your dentist about options to improve your fit or remake your denture.
Need Help?
Email us! HELP@densurefit.com
Call us! 844-682-3368 Mon-Fri (8 am-5 pm, Pacific Standard Time)
Click here to read Frequently Asked Questions.
We believe DenSureFit will provide you with the best fit you’ve ever had with your dentures.
We are 100% committed to your success.
-
CAUTION
Do not use immediately following extractions. Consult your dentist before using!
-
Acrylic Dentures
DenSureFit is for use on ACRYLIC dentures. Not for use on alternative denture materials.
-
Applying over a soft professional reline?
Please follow the instructions on the “Upper Denture Snug-Up Application” page. After Step 4: look for "Variation for Applying PRIMER Over Soft Professional Reline."
Click here. -
Do you have a partial denture?
Pay close attention to the variation when seating a PARTIAL.
See "Upper Denture Reline Instructions" page, below "Step 5: Seat Your Denture."
Click here.
DenSureFit Featured Collection
-
 Sale
SaleComplete Care Bundle
Regular price $229.98Regular priceUnit price per$289.85Sale price $229.98Sale -
Lower+Upper Denture Reline Kit
Regular price $91.98Regular priceUnit price per$114.98Sale price $91.98Sale -
Upper Denture Reline Kit
Regular price $64.99Regular priceUnit price per -
Lower Denture Reline Kit
Regular price $49.99Regular priceUnit price per


